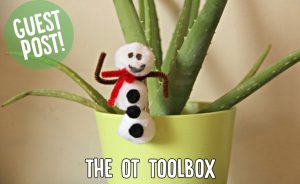
Countdown to Christmas Snowman

Start the countdown to Christmas with an adorable snowman plaque! Give hand lettering a try to add a touch of whimsy to your numbers.
printTemplate DownloadMaterials
Paint
Rainbow Fuzzy Sticks
Jumbo Craft Sticks
Craft Foam (Black)
Glitter (Red)
Wooden Circle Plaque
Scissors
Craft Glue or Hot Glue *Adult Assistance Required
Orange or Clear Pushpin
Pencil
Large Wiggly Eyes
Instructions
Step 1.
Paint a wooden circle plaque white. This will be your snowman’s head!

Step 1.
Paint a wooden circle plaque white. This will be your snowman’s head!
Step 2.
Poke a hole in the middle of the circle with a pushpin.

Step 2.
Poke a hole in the middle of the circle with a pushpin.
Step 3.
Cut a jumbo craft stick in half, as shown.

Step 3.
Cut a jumbo craft stick in half, as shown.
Step 4.
Cut a half of the jumbo craft stick from Step 4 diagonally, as shown, to create the snowman’s carrot nose.

Step 4.
Cut a half of the jumbo craft stick from Step 4 diagonally, as shown, to create the snowman’s carrot nose.
Step 5.
Wrap his nose in an orange fuzzy stick.

Step 5.
Wrap his nose in an orange fuzzy stick.
Step 6.
Wrap the end of the fuzzy stick around the pushpin to attach to the snowman’s head. Make sure it’s not too tight – you want to be able to spin the nose around.

Step 6.
Wrap the end of the fuzzy stick around the pushpin to attach to the snowman’s head. Make sure it’s not too tight – you want to be able to spin the nose around.
Step 7.
Warm up your snowman with some pink rosy cheeks!

Step 7.
Warm up your snowman with some pink rosy cheeks!
Step 8.
Bring your snowman to life with a craft foam hat – just like Frosty! Cut out a long skinny rectangle to be the bottom of the top hat, then cut a square out of foam to make the top of the hat.

Step 8.
Bring your snowman to life with a craft foam hat – just like Frosty! Cut out a long skinny rectangle to be the bottom of the top hat, then cut a square out of foam to make the top of the hat.
Step 9.
Glue on the hat and give your snowman some big wiggly eyes so he can see!

Step 9.
Glue on the hat and give your snowman some big wiggly eyes so he can see!
Step 10.
Finish of your snowman’s attire with a red fuzzy stick stripe across his hat; now he’s smiling from ear to ear – or cheek to cheek!

Step 10.
Finish of your snowman’s attire with a red fuzzy stick stripe across his hat; now he’s smiling from ear to ear – or cheek to cheek!
Step 11.
Write “DAYS TIL CHRISTMAS” in white paint on the top part of his hat. Use pencil to write out the letters first, then outline it. Add accents with red glitter glue for a dash of sparkle.

Step 11.
Write “DAYS TIL CHRISTMAS” in white paint on the top part of his hat. Use pencil to write out the letters first, then outline it. Add accents with red glitter glue for a dash of sparkle.
Step 12.
Write 1 – 24 around the edge of your snowman and countdown to the best day of the year!

Step 12.
Write 1 – 24 around the edge of your snowman and countdown to the best day of the year!


