How to Use A Weaving Loom to Make a Potholder
Learn the basic techniques to weave and create a crocheted edge for pot holders using the Made by Me™ Weaving Loom.
Materials
- Made by Me™ Weaving Loom
Instructions
|
Step 1. Gather your supplies.
|
|
|
|
Step 2. Attach a craft loop onto loom by stretching and lining up the loops with the prongs that are across one another. |
|
|
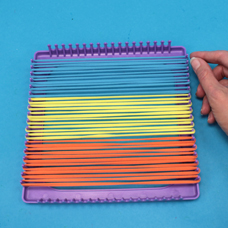
Step 3. Continue to attach craft loops onto loom as shown. |
|
|
Step 4. Turn loom so the attached loops are vertical. Take your crochet hook and begin weaving between your attached loops, going over one loop but under the next in a woven pattern. In our example, we were weaving from right to left. |
|
|
Step 5. Once your hook is woven through all the attached loops, attach one end of a new loop to the hook and the other to the prong as shown. |
|
|
Step 6. Pull the hook with the loop attached. This will cause the loop look to be woven throughout the attached loops. Once the hook is pulled all the way through, attach the other end of the loop to the prong. You should now have 1 loop woven through your loom. Tip: Some might also find this easier by using their fingers and not the hook! |
|
|
Step 7. Repeat steps 4 – 6 with a new loop, making sure to go complete the opposite over/under weaving pattern of the previous loop. For example: if you went under the first loop when weaving your last piece, this time start by going over. |
|
|
Step 8. Repeat steps 4-7 with additional loops until your loom is completed filled with colorful loops. |
|
|
Step 9. To complete the pot holder, you must create a crocheted edge. Start with the first 2 loops on one side of the loom. Remove the first loop from the prong and place into the hook in your right hand. With your left hand, remove the second loop from the prong and hold it, as shown. |
|
|
Step 10. Using the hook, thread the first loop through the second loop. |
|
|
Step 11. Release the first loop from the hook and pull the first loop to tighten. Attach this loop back to the 2nd prong. |
|
|
Step 12. Repeat step 9 with next loops, attaching loop 2 to the hook with your right hand and holding loop 3 with your left hand. |
|
|
Step 13. This time, push the left loop (#3) through the right loop (#2) with your finger. |
|
|
Step 14. Once the left loop is through, continue to pull it all the way through. |
|
|
Step 15. Remove the hook and pull the loop tight. |
|
|
Step 16. Repeat steps 12-15 around all four edges of the pot holder. |
|
|
Step 17. Once you have completed the edges, you will have 2 loops left to connect. Hold the right loop with the hook in your right hand, and he left loop with your left hand. |
|
|
Step 18. Push the left loop through the right loop with your left hand, as shown. |
|
|
Step 19. Pull the left loop tight. |
|
|
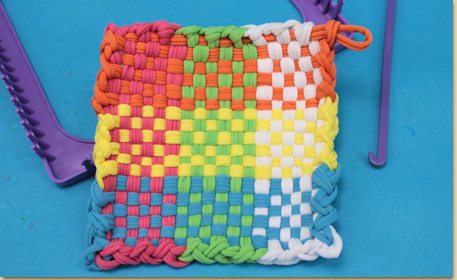
Step 20. Your pot holder is complete! |