Santa and Penguin Magnets
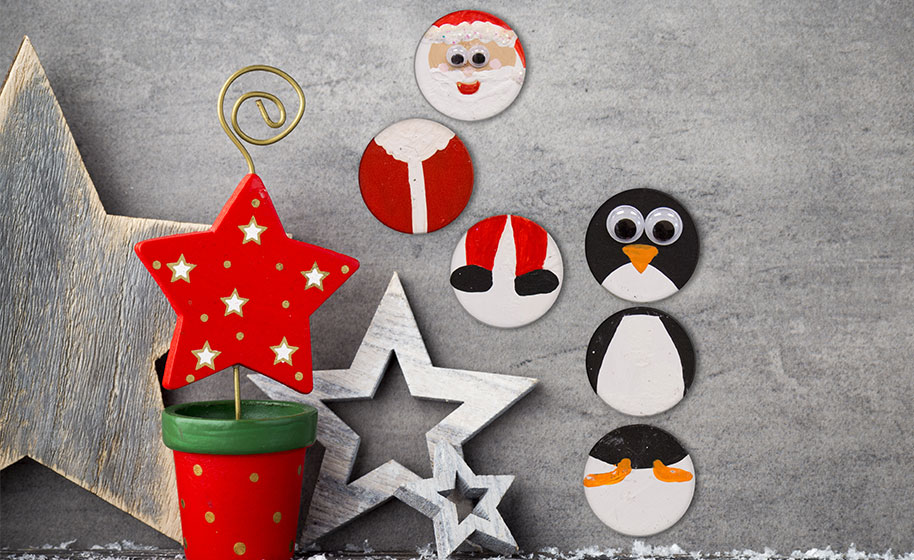
All you need are a few simple materials to create adorable little mix and match magnets! We made Santa and a penguin – but let your creativity fly! You can create any creatures or characters you like, then use them as a puzzle game for little ones to put in order!
Materials
Magnetic Buttons
Small Wiggly Eyes
Paint
Paint Brushes
Instructions
Step 1.
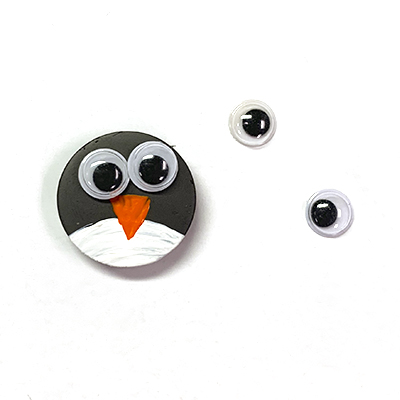
Each of our magnet characters will use 3 magnetic buttons and 1 set of small wiggly eyes.

Step 1.
Each of our magnet characters will use 3 magnetic buttons and 1 set of small wiggly eyes.
Step 2.
To begin your penguin, paint a semi-circle on the top magnet, a rectangle that is wider at the bottom on the middle magnet, and a half circle on the bottom magnet.

Step 2.
To begin your penguin, paint a semi-circle on the top magnet, a rectangle that is wider at the bottom on the middle magnet, and a half circle on the bottom magnet.
Step 3.
On the top magnet, use orange paint to add a triangle beak. On the bottom magnet, paint two little feet!

Step 3.
On the top magnet, use orange paint to add a triangle beak. On the bottom magnet, paint two little feet!
Step 4.
Glue 2 wiggly eyes to your top magnet, just above the beak.
Step 4.
Glue 2 wiggly eyes to your top magnet, just above the beak.
Step 5.
Arrange your penguin in the correct order, from top to bottom!

Step 5.
Arrange your penguin in the correct order, from top to bottom!
Step 6.
To begin, paint all 3 of the magnets white, and allow to dry.
Let’s start with the middle circle of your Santa. Paint the right and left sides red, leaving a white stripe in the center.

Step 6.
To begin, paint all 3 of the magnets white, and allow to dry.
Let’s start with the middle circle of your Santa. Paint the right and left sides red, leaving a white stripe in the center.
Step 7.
Paint 2 red legs onto the bottom magnet.

Step 7.
Paint 2 red legs onto the bottom magnet.
Step 8.
Then, use black paint to paint shoes below the legs. For the top magnet, paint a small red hat at the top, paint a face and smile, then glue on 2 small wiggly eyes.

Step 8.
Then, use black paint to paint shoes below the legs. For the top magnet, paint a small red hat at the top, paint a face and smile, then glue on 2 small wiggly eyes.
Step 9.
Arrange your adorable painted magnets on your fridge, or use a cookie sheet or baking pan to play and re arrange!

Step 9.
Arrange your adorable painted magnets on your fridge, or use a cookie sheet or baking pan to play and re arrange!